


Ralight LED 360W: which of the three versions should you choose?
Ralight offers three 360W LED versions with the same PPF but different layouts. Compare their bar arrangement, space requirements and light distribution before choosing.
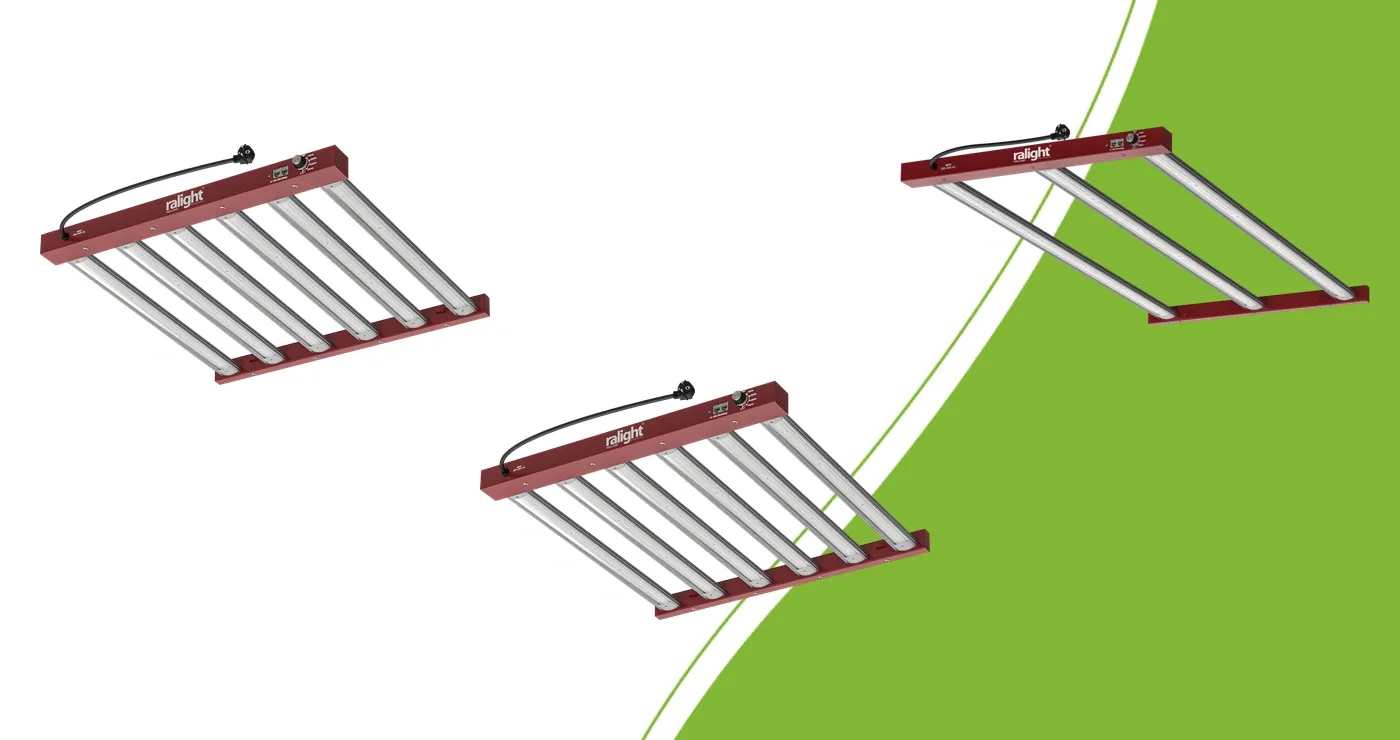
Start with the shape of your growing area
Choosing a Ralight LED grow light involves more than wattage. The three 360W versions share the same rated power and total light output. They do not automatically suit the same setup. Bar placement, available headroom and the shape of your crop all affect how light is distributed.
Measure the internal width and depth. Establish the height left above the crop once pots, plants, suspension and other equipment are in place. Keep access to your plants clear. A fixture that only just fits between the walls may still leave too little room for cables or installation.
What do the models share?
All three models are rated at 360W, with 972 µmol/s PPF and 2.7 µmol/J efficacy. They use an integrated Ralight driver and offer 25%, 50%, 75% and 100% settings. These shared values make them comparable as main lights, but do not establish the intensity at every point of the growing area.
PPF describes the fixture’s total photon output. To assess the light reaching your plants, look at PPFD and its distribution across the area. Include the centre, edges and corners. A high central reading does not demonstrate even coverage.
Six bars or three: match the layout
The Ralight 360W designated 60×60 has a square layout with six light bars.
The Ralight 360W designated 80×80 is also square and has six light bars. Check the exact version when replacing an existing fixture.
The Ralight 360W designated 120×60 is rectangular and has three light bars. Consider this layout for a rectangular growing area.
These model designations are not fixed growing footprints. Confirm the actual outside dimensions, mounting arrangement and connection clearance of the chosen version before ordering for a tight space. Then assess light distribution at a height you can use in that space.
Compare hanging height and dimming together
Lower placement changes intensity and spread. Hanging higher requires headroom and can change distribution. Avoid applying a single distance to all three versions. Work within the operating and mounting requirements of the exact model and match settings to your plants and growth stage.
When comparing two setups, keep measuring points and sensor height consistent and record hanging distance and dimming. Use an appropriate PPFD meter. Change one setting at a time to assess its effect in your setup, without assuming a fixed yield or growing footprint.
Include control and energy use
Manual dimming and external control are separate choices. For a central controller, the driver, control signal and cable must suit your version. An RJ14 port alone does not establish that combination. Explore grow light controllers with the exact fixture model to hand.
Calculate energy use as actual input power in watts ÷ 1000 × operating hours. An actual draw of 360W for twelve hours uses 4.32 kWh. Multiply this by your electricity tariff. This calculation is not a power measurement; a 50% dimming setting does not establish measured consumption. Add the rest of your equipment separately.
Your buying checklist
Measure the growing area and headroom above your plants.
Choose a square or rectangular bar arrangement.
Confirm physical dimensions, mounting points and cable clearance.
Assess PPFD distribution at a usable height and dimming setting.
Check controller compatibility and calculate actual energy use.
Then compare the current versions in our Ralight LED range. You do not have to move to another wattage to answer this question: start by finding the layout that suits your setup.