


What is in a complete grow tent kit? Buying checklist
A complete grow tent needs lighting, air extraction, circulation, controls and growing supplies. We explain each item, recommend specific kits and show how equipment quantities change as the tent gets larger.

Which complete grow tent kit do we recommend?
Start with a size you can accommodate and maintain. These are our practical starting points; choose pots, growing media and nutrients separately.
Mammoth Lite 60 Starter — For a compact 60 × 60 × 140 cm setup: one tent, one Ralight 250W LED, extraction, filter, controls and climate monitoring. A useful starting point when you do not already own the included equipment.
Mammoth Pro 120 Professional — For 120 × 120 × 200 cm: one DimLux Xplore 730W 3.0, one extractor and one clip fan. Our choice when you want this tent size, the Pro tent range and this light model.
Mammoth Pro 240L Professional — For 240 × 120 × 200 cm: two DimLux lights, a Can Fan RK 160 L and a DimLux Maxi Controller. Choose this kit for a longer setup with two lights.
Mammoth Pro 240 Professional — For 240 × 240 × 200 cm: four DimLux lights, a Can Fan RK 200 and two clip fans. Plan access, watering and electrical capacity for this larger installation.
What is in a complete grow tent? The equipment list
These ten items make up the equipment in the Mammoth Lite 60 Starter kit. The quantities below belong to that specific kit. Other sizes mainly change the lighting, extraction capacity and air distribution. You do not need to buy these items a second time when purchasing this kit.
1× Grow tent: Mammoth Lite+ 60. Provides a defined space for controlling light and climate. Its reflective interior helps use the light within the setup. Check height as well as floor dimensions: pots, lights and hanging equipment use part of that height.
1× LED grow light: Ralight 250W LED. Provides light for your plants. Choose a fixture for its dimensions, light distribution and your crop. Adjust power and hanging height accordingly; maximum wattage is not a required operating setting.
1× Extractor fan: Can Fan RK 125 L. Replaces air in the tent and removes warm, humid air. It moves air out of the tent. This differs from the clip fan, which moves air around inside.
1× Carbon filter: CAN Lite 425 PL in the Starter kit. Helps reduce odours in extracted air. Select fan and filter together for airflow capacity and connection size. A filter rating is not the guaranteed airflow of the assembled installation.
1× Ducting: Combiconnect 127 mm, 10 m. Connects the ventilation components and carries extracted air to the chosen outlet. Plan the route first. Long ducts, kinks and bends add resistance.
3× Duct clamps: 65–165 mm duct clamps. Secure the duct connections. This kit contains three clamps. The required number follows the number of connections, rather than the number of plants or lights.
1× Fan controller: Fan controller with thermostat. Controls the extractor. Choose a controller for the fan motor type and electrical load; a light dimmer is not a substitute.
1× Circulation fan: Hortistar Clipfan 20 cm, 20W in the Starter kit. Distributes air inside the tent and through the plants. Position it for gentle movement rather than a continuous strong air stream aimed at one plant.
1× Timer: Legrand Omnirex in the Starter kit. Switches lighting on and off at the chosen times. Larger kits may use a lighting controller instead. Match switching equipment to the connected devices and permitted switching load.
1× Thermo-hygrometer: Digital thermo-hygrometer. Shows temperature and relative humidity. Measure at a representative position near the plants. It does not measure acidity or nutrient concentration; those require pH and EC equipment.
What else do you need to start growing?
An equipment kit does not include the entire crop setup. Choose these supplies separately; they are not standard items in the kits discussed here:
Pots and drainage collection — Choose pots for root space and your watering method, with a way to collect drainage. More plants require more pots and collection points. A larger tent does not oblige you to grow more plants.
Growing media — Choose soil, coco or another medium for your method. Quantity follows the number of pots and their usable fill volume. Six pots filled with 10 litres each need about 60 litres of medium; this is a calculation example, not a recommendation to grow six plants.
Plant nutrients — Choose nutrients for soil, coco or your other growing method and growth stage. More water and plants may require more nutrient solution. Do not raise concentration simply because the tent is larger.
Water and watering equipment — For hand watering, choose a suitable watering vessel and somewhere to mix water and collect drainage. Automatic irrigation additionally needs a reservoir, pump, tubing and enough watering points for your layout.
pH and EC equipment — Use this to check irrigation water and nutrient solution when your method calls for it. Include the calibration and maintenance supplies required by your meter.
Hanging hardware, plants and power — Add your plants or seeds. Check which hooks, ratchets, fixings and cables come with the equipment and buy only what is missing. Plan sockets and electrical capacity for all equipment together.
Why does a larger grow tent need more lights?
Doubling both length and width makes the floor four times larger. A 120 × 120 cm tent has 1.44 m² of floor space; 240 × 120 cm has 2.88 m² and 240 × 240 cm has 5.76 m². Light must be distributed across that larger area.
The three Professional kits illustrate this with one, two and four units of the same DimLux Xplore 730W 3.0. Multiple fixtures can be distributed around the layout. One brighter light in the centre does not automatically provide the same distribution at the edges.
Treat these quantities as specific kit examples. The appropriate light count also depends on fixture dimensions, light distribution, hanging height, crop and dimming. Do not calculate it from wattage alone or a universal rule per square metre. The floor areas above are the geometric tent dimensions.
Actual quantities: Pro 120, Pro 240L and Pro 240
| Item | Pro 120 Professional | Pro 240L Professional | Pro 240 Professional |
|---|---|---|---|
| Tent (L × W × H) | 120 × 120 × 200 cm | 240 × 120 × 200 cm | 240 × 240 × 200 cm |
| DimLux Xplore 730W 3.0 | 1× | 2× | 4× |
| Extractor | 1× Can Fan RK 125 L | 1× Can Fan RK 160 L | 1× Can Fan RK 200 |
| Carbon filter | 1× CAN Lite 425 PL | 1× CAN Lite 600 | 1× CAN Lite 800 |
| Hortistar clip fan | 1× | 1× | 2× |
| Fan controller | 1× | 1× | 1× |
| Climate meter with external sensor | 1× | 1× | 1× |
| Lighting control | 1× Legrand Omnirex | 1× DimLux Maxi Controller EVO 1.2 | 1× DimLux Maxi Controller EVO 1.2 |
| Ducting / clamps | 1× 10 m / 3× clamps | 1× 10 m / 3× clamps | 1× 10 m / 3× clamps |
More airflow does not necessarily mean more extractors
Each of the three Professional kits contains one extractor. The model changes from RK 125 L to RK 160 L and RK 200. Filter and duct sizes also change. A larger tent often needs a ventilation system with more capacity rather than a separate extractor for each light.
Consider tent volume, actual light power, heat, moisture and resistance from the filter and ducting. At the same 2 m height, air volume increases from 2.88 m³ in Pro 120 to 5.76 m³ in Pro 240L and 11.52 m³ in Pro 240. The fan’s free-air rating alone is not sufficient.
Inside the tent, air distribution depends on length, width, corners and plant density. Pro 120 and Pro 240L each contain one clip fan; Pro 240 contains two. Another circulation fan can serve a hard-to-reach corner, but it does not replace extraction.
Explore the 120 and 240L Professional kits
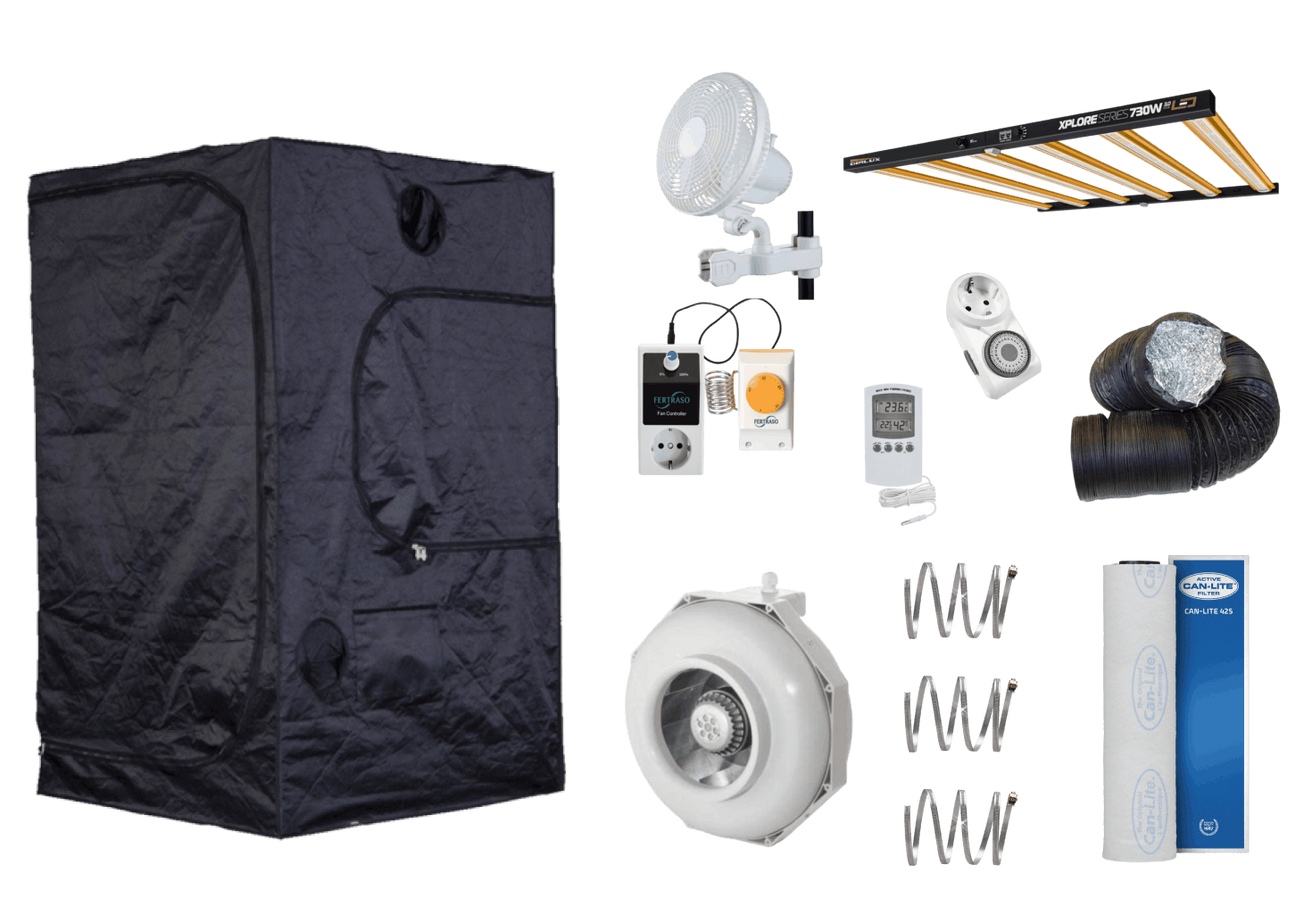
Complete Kweektent Set Mammoth Pro 120 - Professional
Complete professionele kweektentset met de Mammoth Pro 120, 1 groeilamp, krachtige afzuiging, fancontroller, koolstoffilter en complete klimaat- en luchtcirculatiebasis.
- 1× Mammoth Tents | Pro+ 120 (200) | Kweektent 120x120x200cm
- 1× Dimlux | LED Kweeklamp | Xplore Series | 730W | 3,0 µmol/J
- 1× Can Fan buisventilator RK 125 L, 350 m3
- 1× Fancontroller incl thermostaat
- 1× CAN Filters | Can Lite 425 PL | Koolstoffilter 425 m³/h
- 1× Combiconnect 127mm, 10m
- 3× Slangenklem 065-165mm
- 1× Thermo/ Hygrometer met ext. sensor
- 1× Legrand | Omnirex | Tijdschakelaar | Analoog
- 1× Hortistar | Clipfan | 20cm | 20W
View bundleRRP 773.68Sale price € 757.49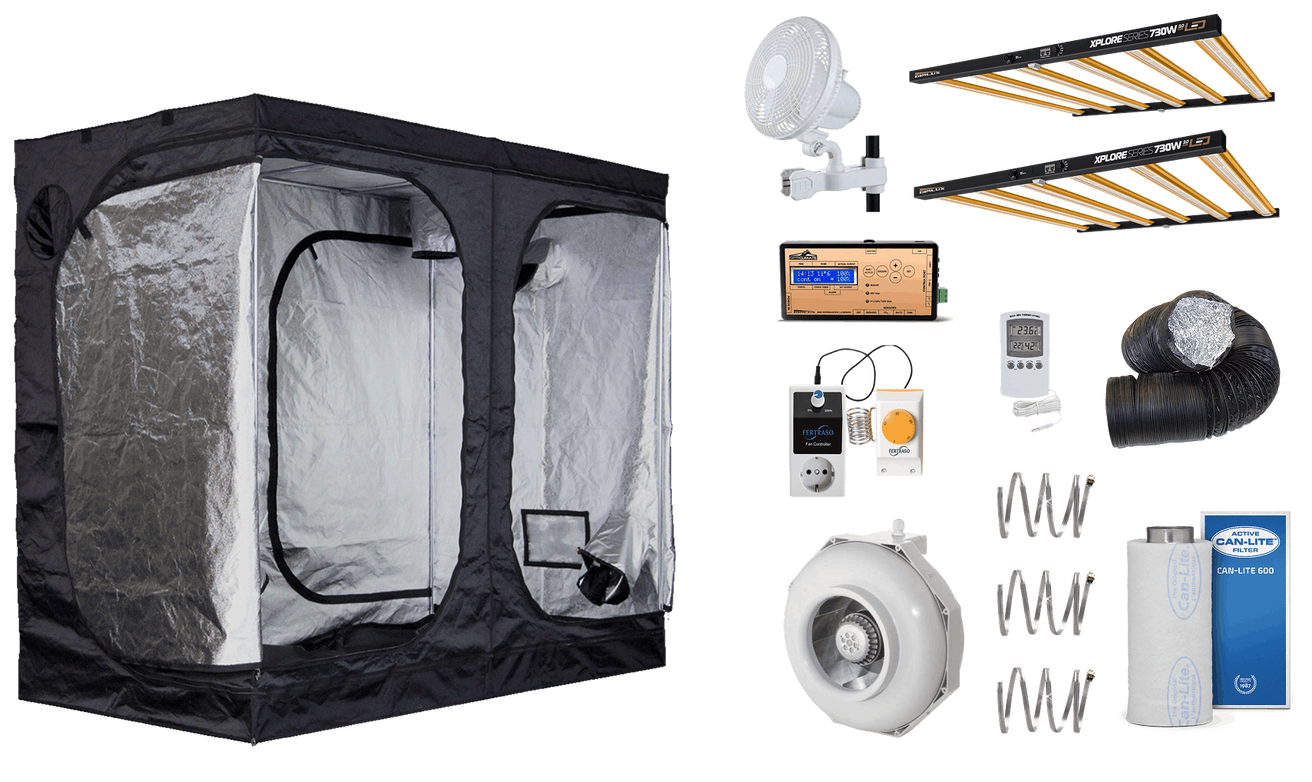
Complete Kweektent Set Mammoth Pro 240L - Professional
Complete professionele kweektentset met de Mammoth Pro 240L, 2 groeilampen, krachtige afzuiging, fancontroller, koolstoffilter en complete klimaat- en luchtcirculatiebasis.
- 1× Mammoth Tents | Pro+ 240L | Kweektent 240x120x200cm
- 2× Dimlux | LED Kweeklamp | Xplore Series | 730W | 3,0 µmol/J
- 1× Can Fan buisventilator RK 160 L, 460 m3
- 1× Fancontroller incl thermostaat
- 1× Can Lite 600 m3 (47,5cm)
- 1× Combiconnect 160mm, 10m
- 3× Slangenklem 065-325mm
- 1× Thermo/ Hygrometer met ext. sensor
- 1× Dimlux | Maxi Controller | EVO 1.2
- 1× Hortistar | Clipfan | 20cm | 20W
View bundleRRP 1,589.51Sale price € 1,478.24
When should you choose an Ultimate kit?
Choose an Ultimate kit when you want advanced climate control and under-canopy lighting as well as the basic equipment, and can provide the installation facilities. The Mammoth Elite S.A. 360 Ultimate contains a 360 × 240 × 225 cm tent, six Lumatek ZEUS 1000W Xtreme 3.1 main lights, six Ralight 120W under-canopy lights and two clip fans.
It also includes a Foam Box extractor, carbon filter, lighting controller, a water-cooled OptiClimate 3500 Pro3 and a CO₂ controller with a separate sensor. Under-canopy lighting and CO₂ control are upgrades; they are not required to complete every small basic setup.
Plan cooling, water, drainage and electrical facilities for this installation. A CO₂ controller and sensor do not themselves supply CO₂; any supply needs a separate plan. Have the required electrical capacity and installation assessed.
Complete your order
Our advice: choose the appropriate equipment kit first, count your pots and watering points, then work out growing media, nutrients and measuring equipment. Finish by checking hanging hardware and installation facilities. This helps you buy what the setup needs without duplicating an included extractor, timer or meter.